How to Do the Chesler Park Hike in the Needles of Canyonlands National Park

Far from the crowds, this corner of Canyonlands is a maze of sandstone towers, hidden canyons, and sweeping desert views. This is the Needles District, near Monticello, Utah (basically in the middle of nowhere), and is about 1.5 hours from the more popular Island in the Sky district.
Chesler Park is the most popular hike in the Needles District of Canyonlands National Park, and once you’re out on the trail, it’s easy to see why.
Chesler Park is a small valley surrounded by colorful, multi-layered spires of sandstone that boggle the mind with their complexity and beauty. And the hike itself is adventurous and varied, so you’ll be engaged the whole time.
I would easily put this on my list of top 10 hikes in Utah national parks. Perhaps even across all the National Parks I’ve done.
That said, the Needles District sees relatively few visitors each year, so even with this being a popular hike, you still won’t feel overcrowded. So read on for all you need to know about hiking the Chesler Park Loop in Canyonlands.
Chesler Park Loop Stats
- Distance: 10 miles/16 km
- Elevation Gain: 1600 feet
- Difficulty: Hard
- Time to Complete: 5-6 hours
- Water Needed: 3 L to 1 gal, depending on time of year
The Trailhead

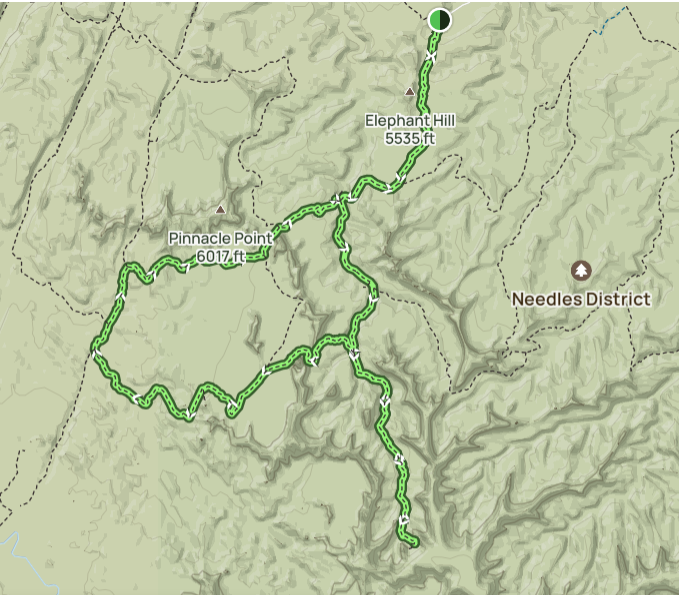
There are a few crisscrossing trails that lead to Chesler Park, but the most direct and accessible way is by starting at the Elephant Hill Trailhead.
It’s about a 10-minute drive from the Needles Visitor Center, located down a dirt road that’s manageable for any vehicle when conditions are dry. If it’s recently rained and the road is muddy, you may run into trouble without high clearance or 4WD.
The Beginning of the Trail
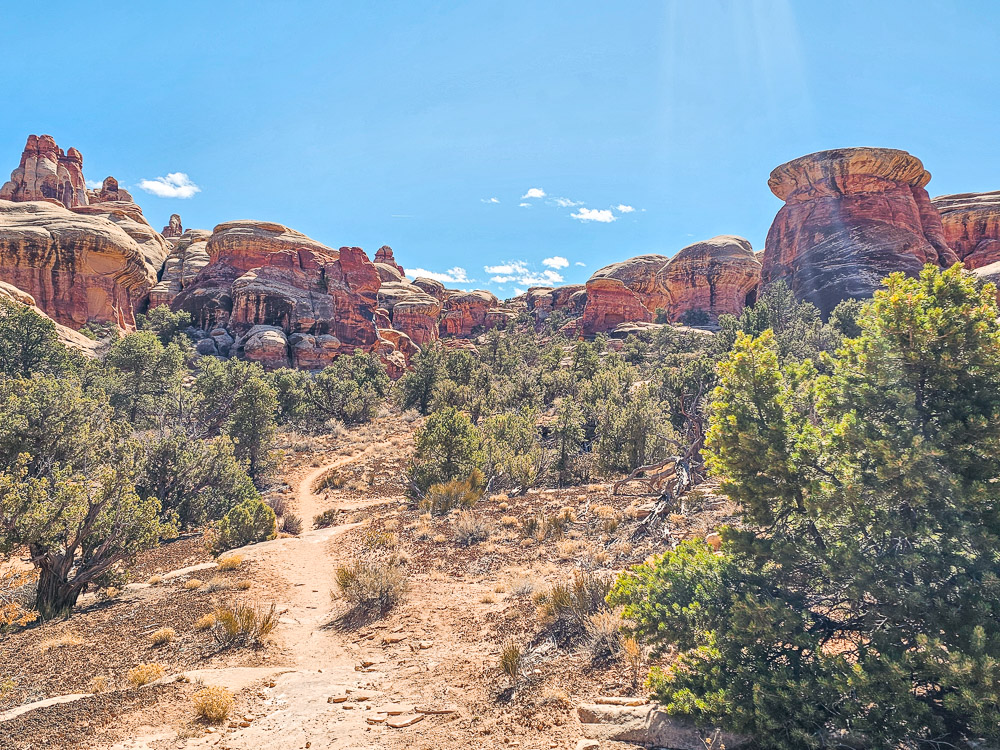
The Chesler Park Loop trail starts strong—very quickly you get to walk through some fantastic scenery.
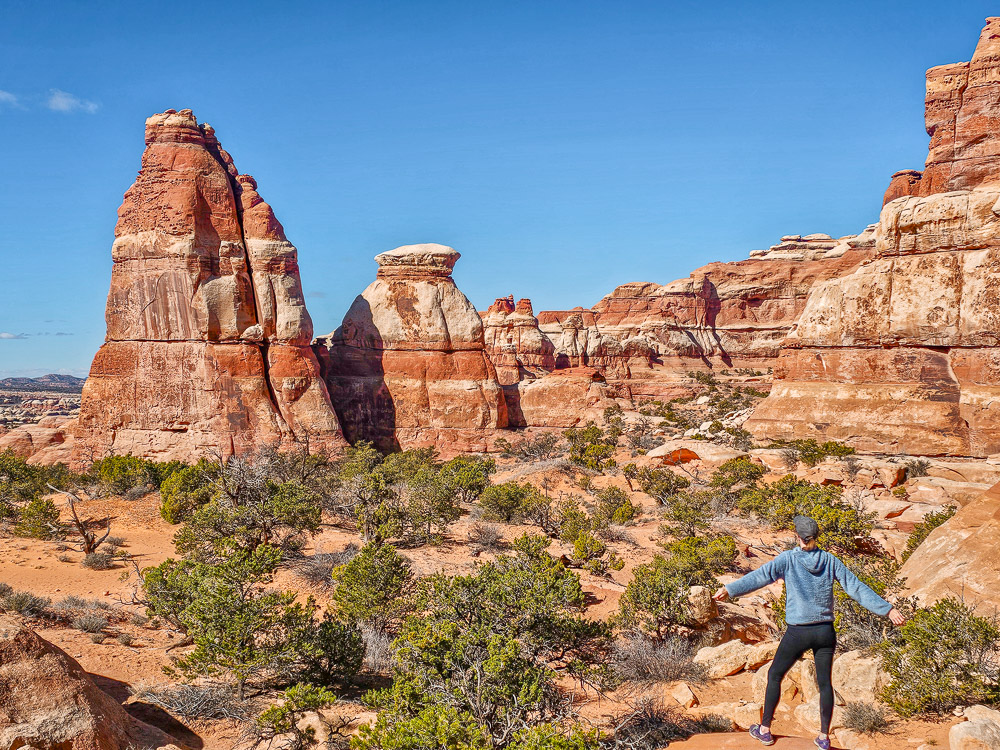
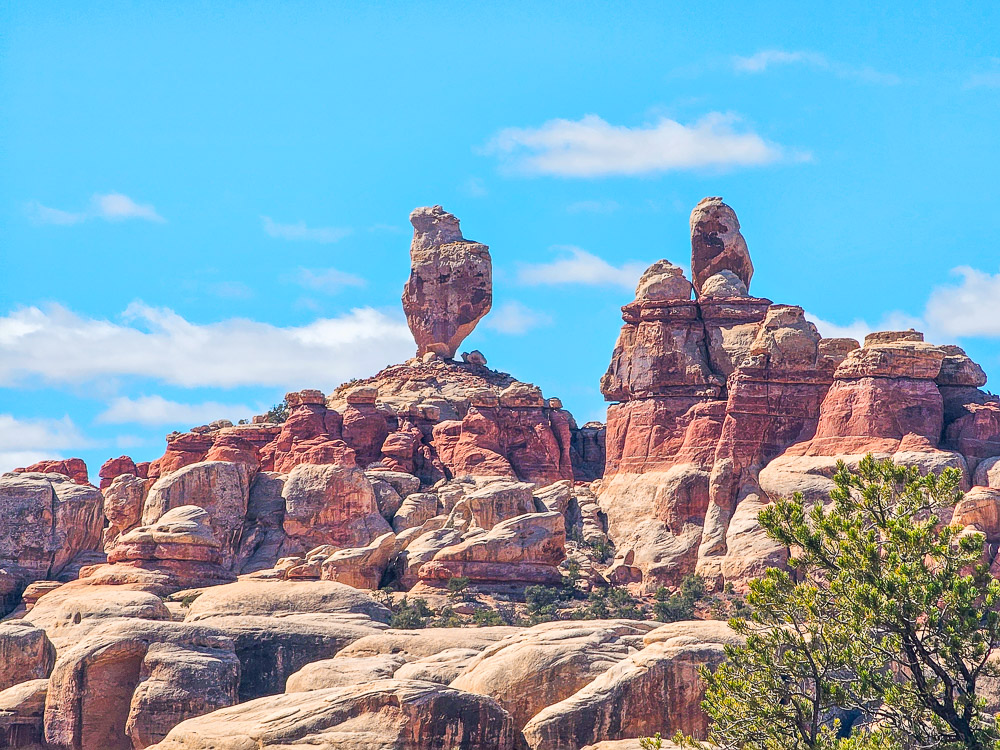
The very first part of the trail is a short but steep 200 feet “staircase”/scramble up to the top of the mesa. Once you’re on top, you’re walking through a landscape that reminded me of Goblin Valley or the toadstool hoodoos—same kind of mushroom-shaped formations, just way bigger.

The best part is, as you keep hiking, you don’t just look at the formations from afar—you get to hike right into them. You’re weaving through these rocks, surrounded by fins, rounded pillars, Needles, and tons of those funky mushroom-shaped rocks. The views are incredible in every direction.
A lot of the trail here is on slickrock, which makes for easy and solid hiking.
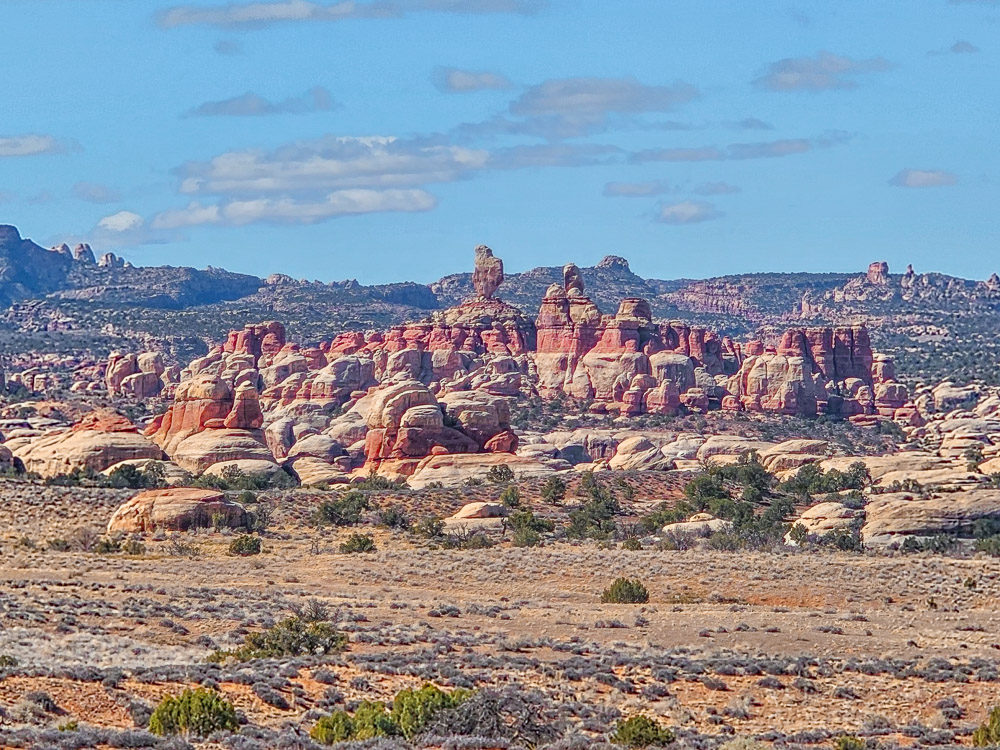
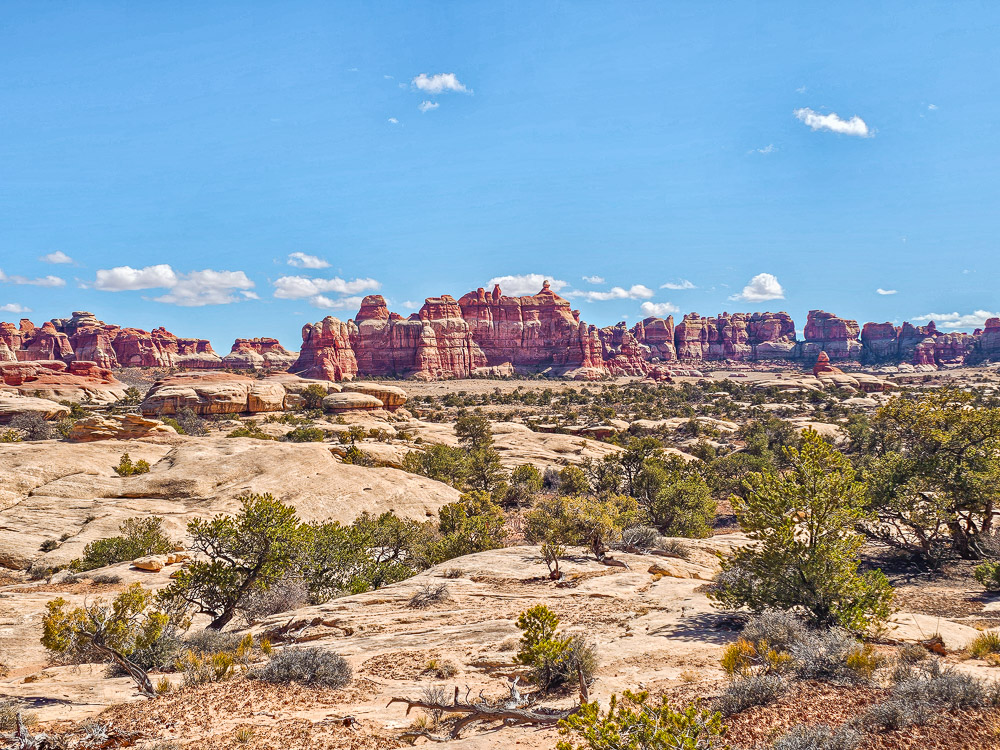
After about a mile, you hit one of the best views of the entire hike—a wide, panoramic lookout over the classic Needles formations. This is where you really see what makes the Needles District so cool. The spires are tall and skinny, packed tightly together in big clusters, with red and white stripes running across them. It’s such a striking view.

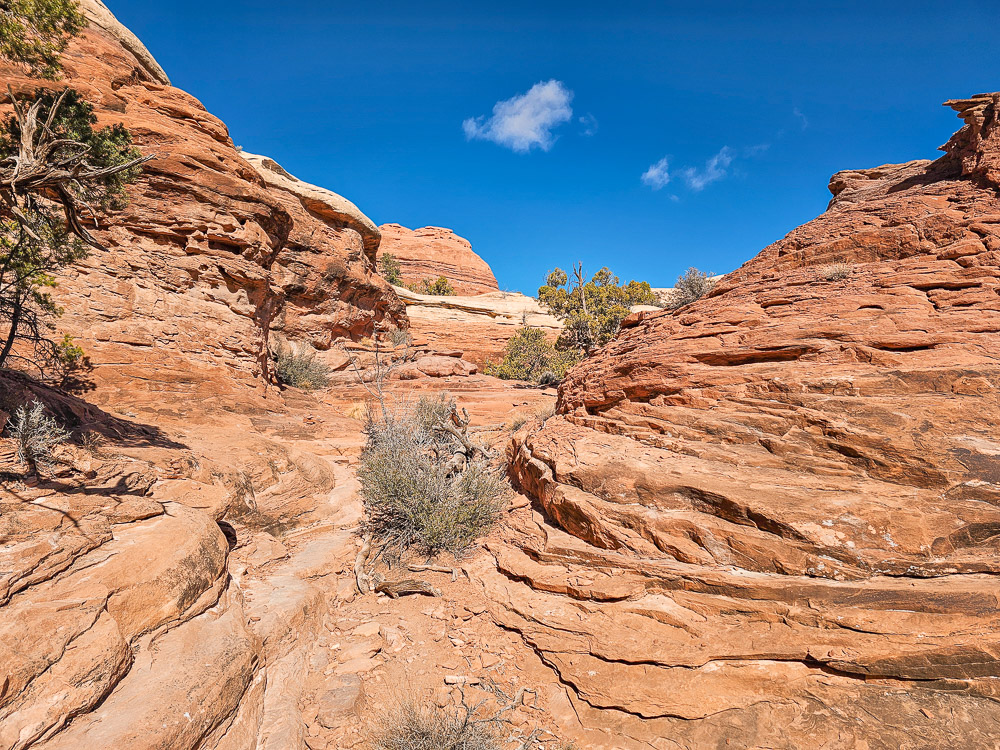
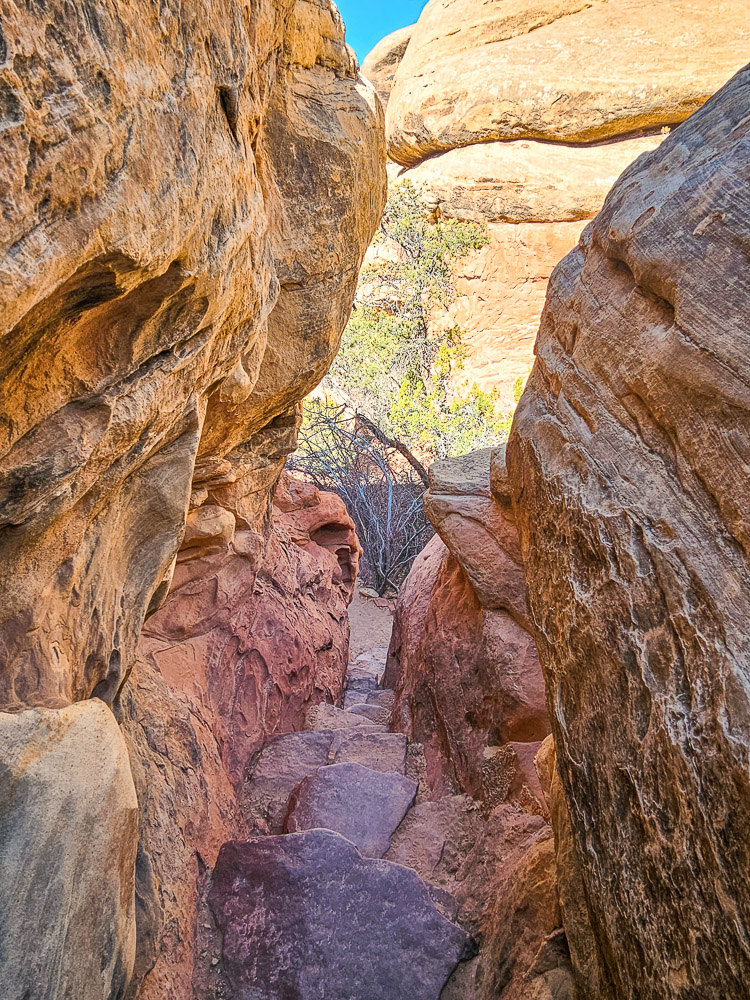
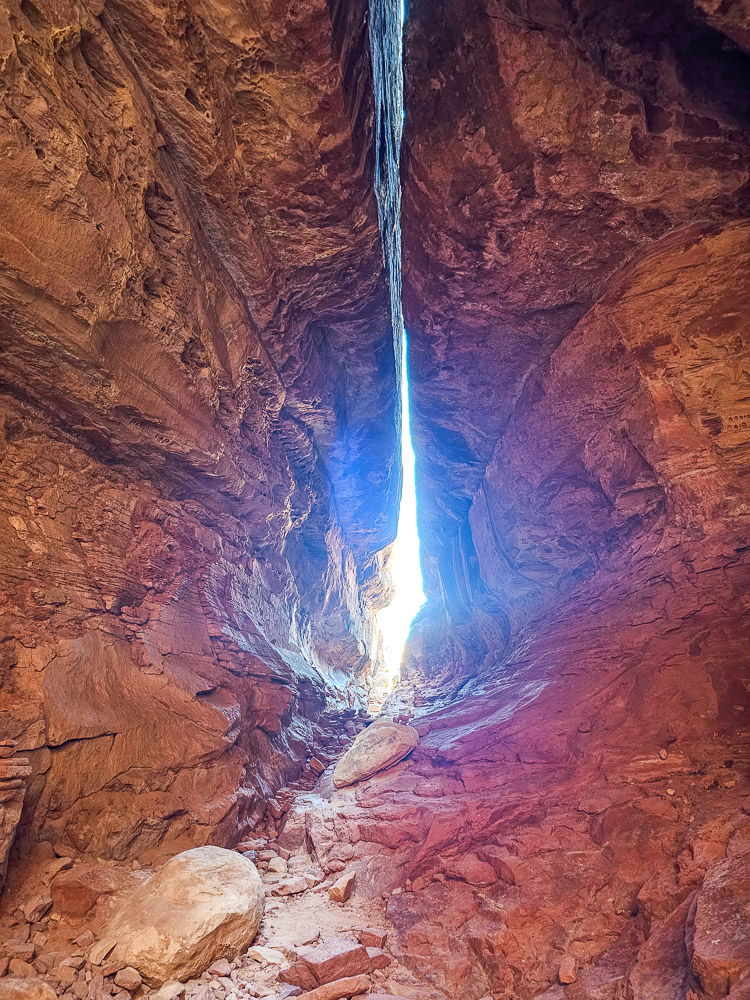
Descending To The Canyon Floor

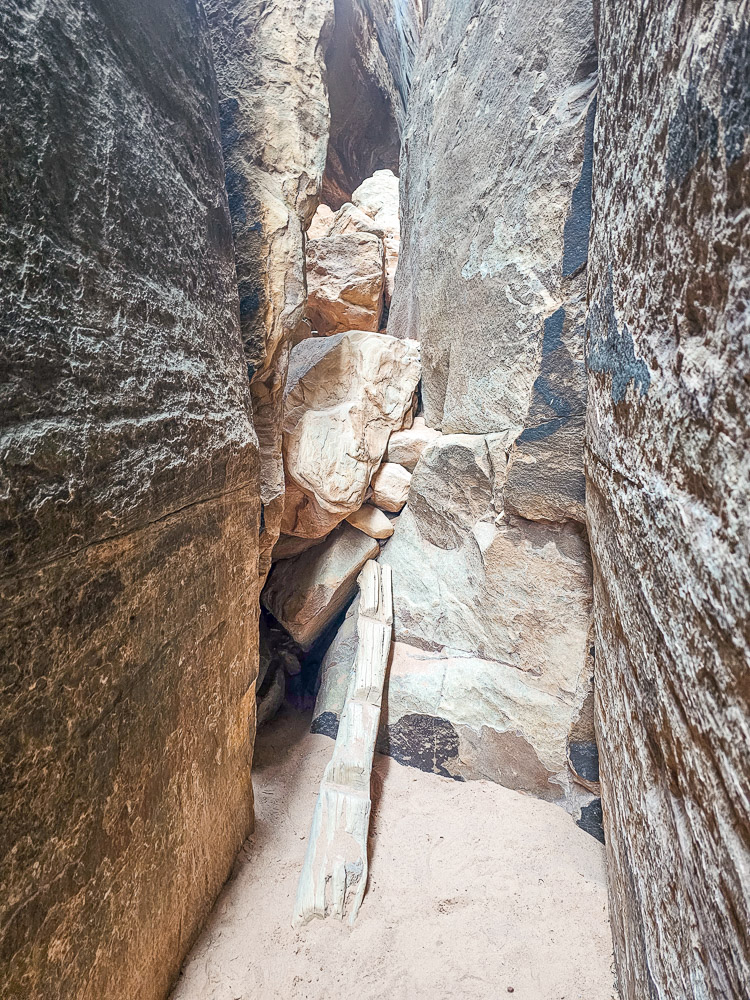
This next section was one of my favorite parts of the whole trail. You’ll first squeeze through a narrow slot canyon between tall slabs of rock, and then enter a cool corridor that feels part cave, part canyon.
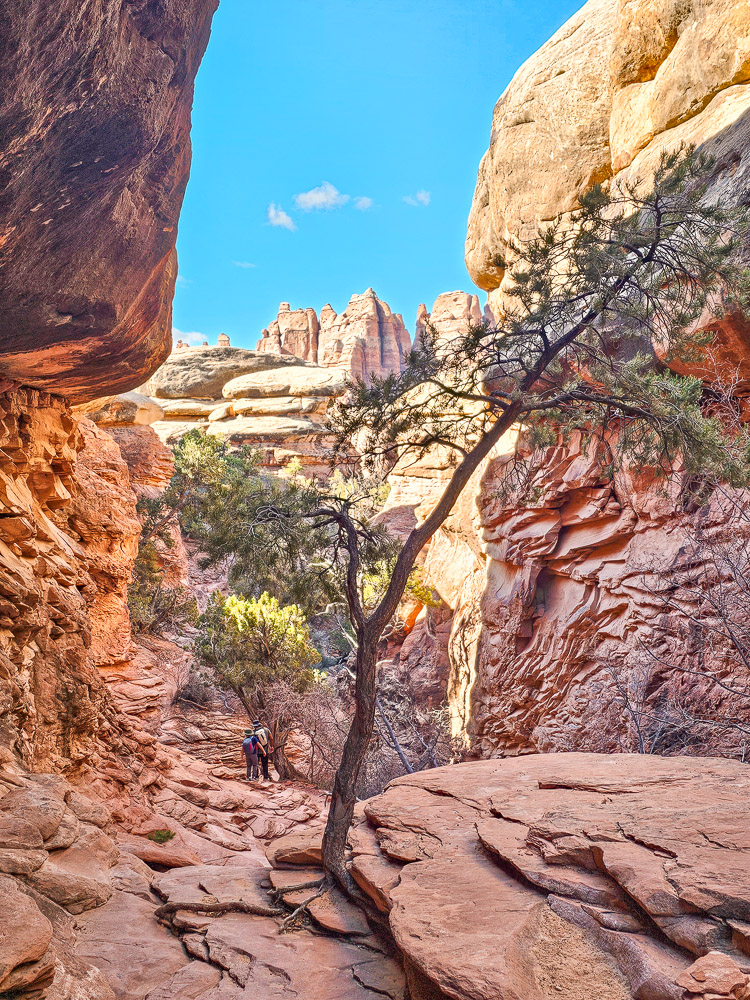
The walls here have tons of texture—ridges, grooves, layers, and ledges that make the area both very rugged and very scenic.
From this cave-like area, the trail drops steeply along a rocky trail as you work your way down to the valley floor. It’s a fun, adventurous section with some awesome scenery all around.
Diverging from the Druid Trail
Up to this point, the Druid Arch trail and Chesler Park trail follow the same route. Once you reach the canyon floor, they split — Druid Arch heads left along the wash, while Chesler Park continues straight across and begins to climb back up.
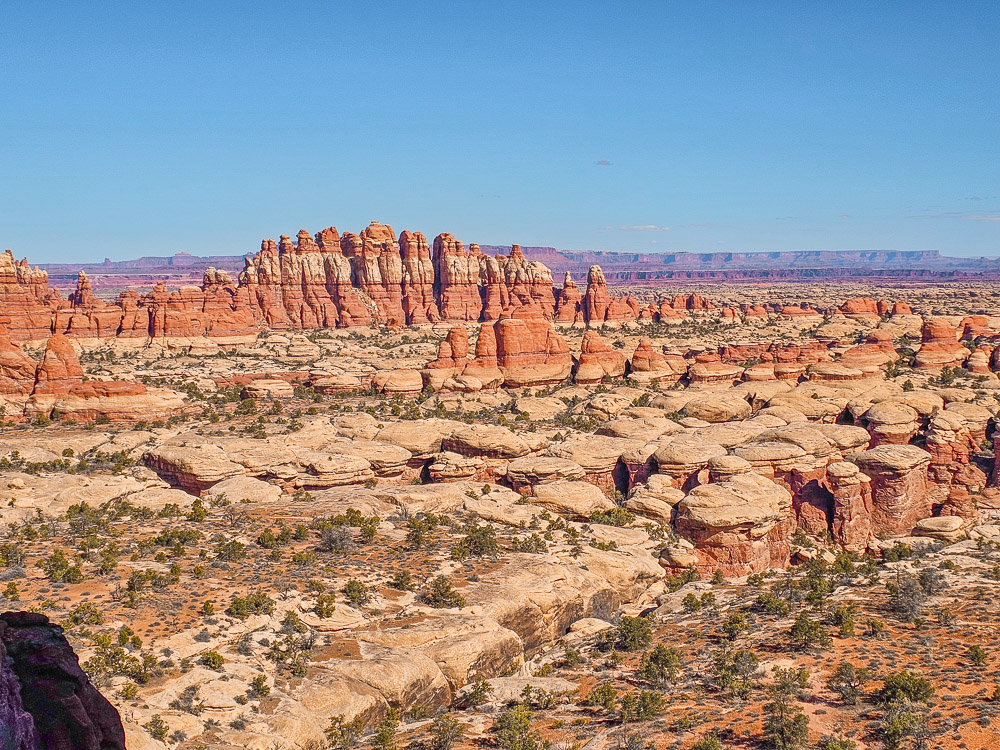
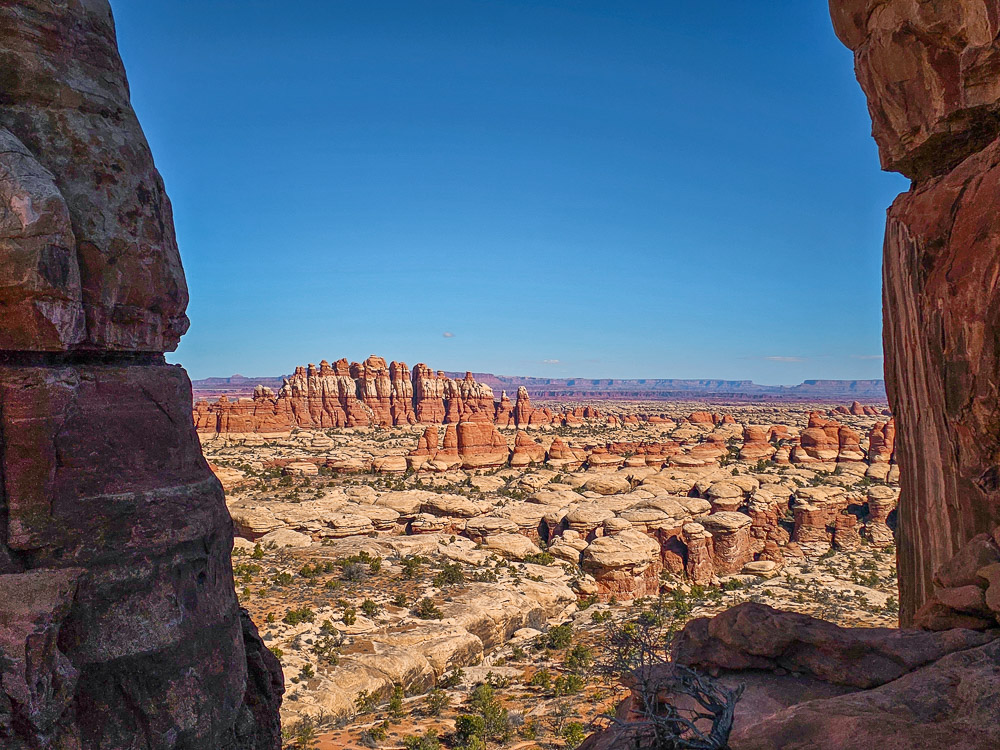
This next stretch is one of the steepest parts of the hike, climbing about 400 feet over a half mile of rugged terrain. But as you gain elevation, the views start to open up, and they really pay off when you reach the Chesler Park Viewpoint.
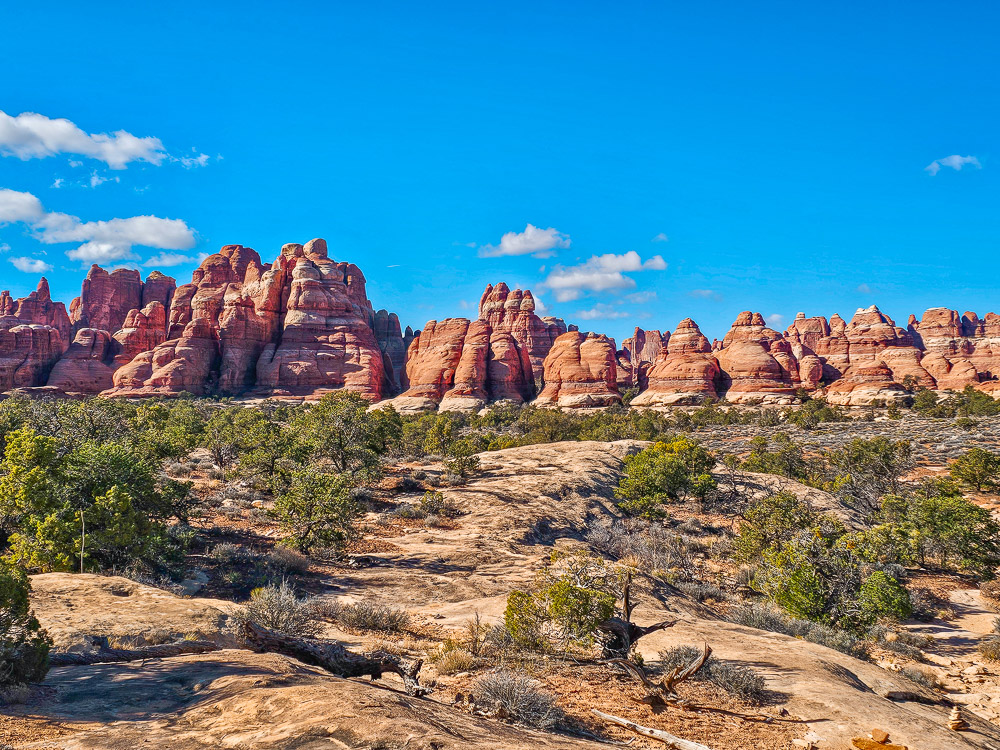
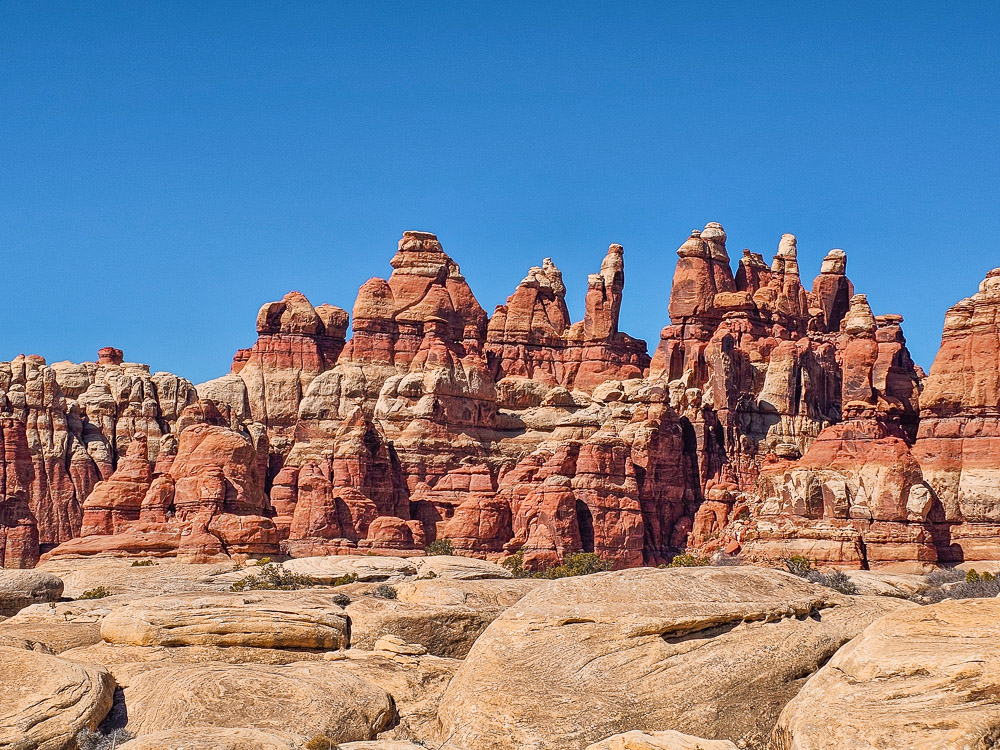
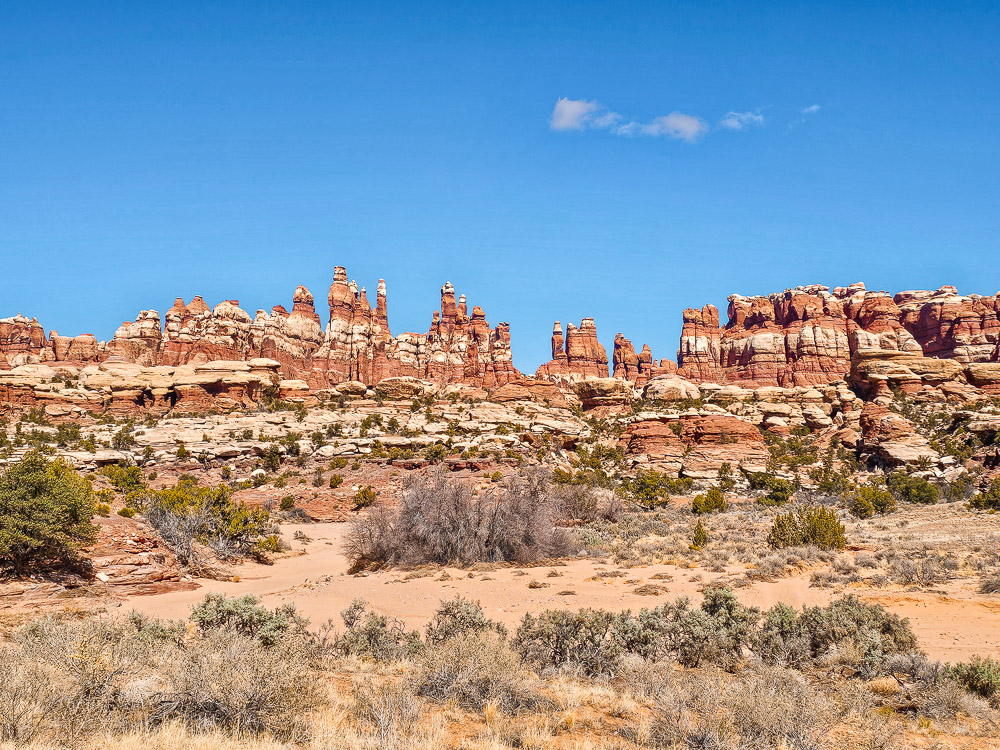
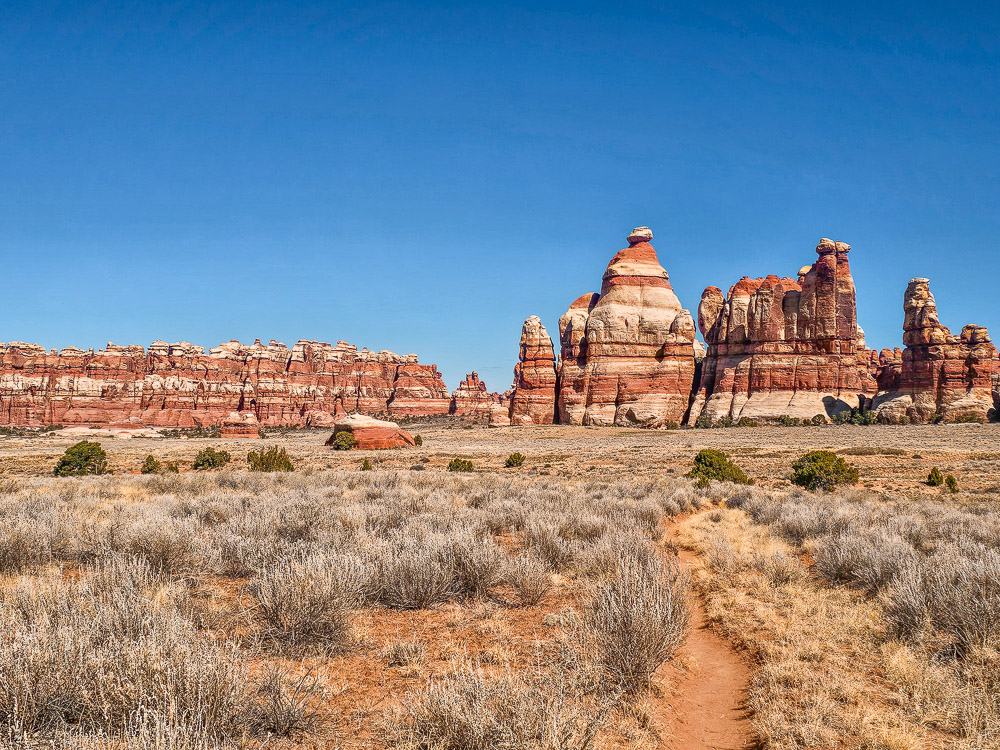
The Chesler Park Viewpoint is incredible. This pass offers dramatic views in both directions — to the north, you’ll see miles of needles and winding canyons stretching into the distance, while to the south, you get your first glimpse of Chesler Park, where cluster after cluster of towering rock spires fill and surround a wide, grassy expanse.
This pass is often quite windy, which frankly, is a welcome relief after the hard ascent.
Here are a few photos of different angles of the viewpoint:
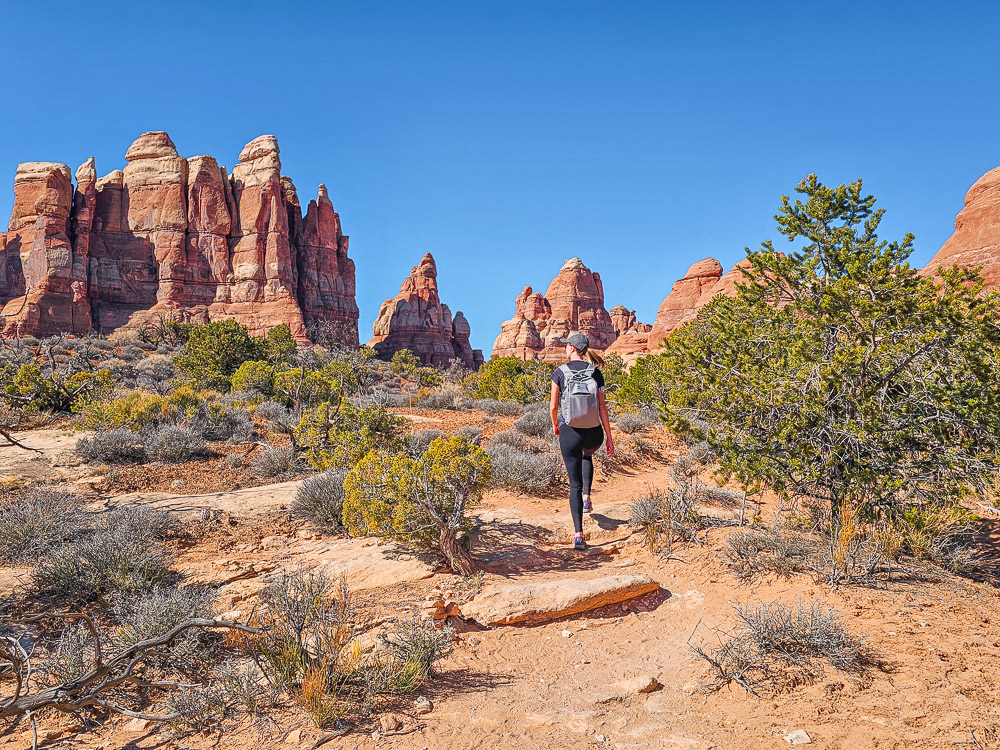
Chesler Park
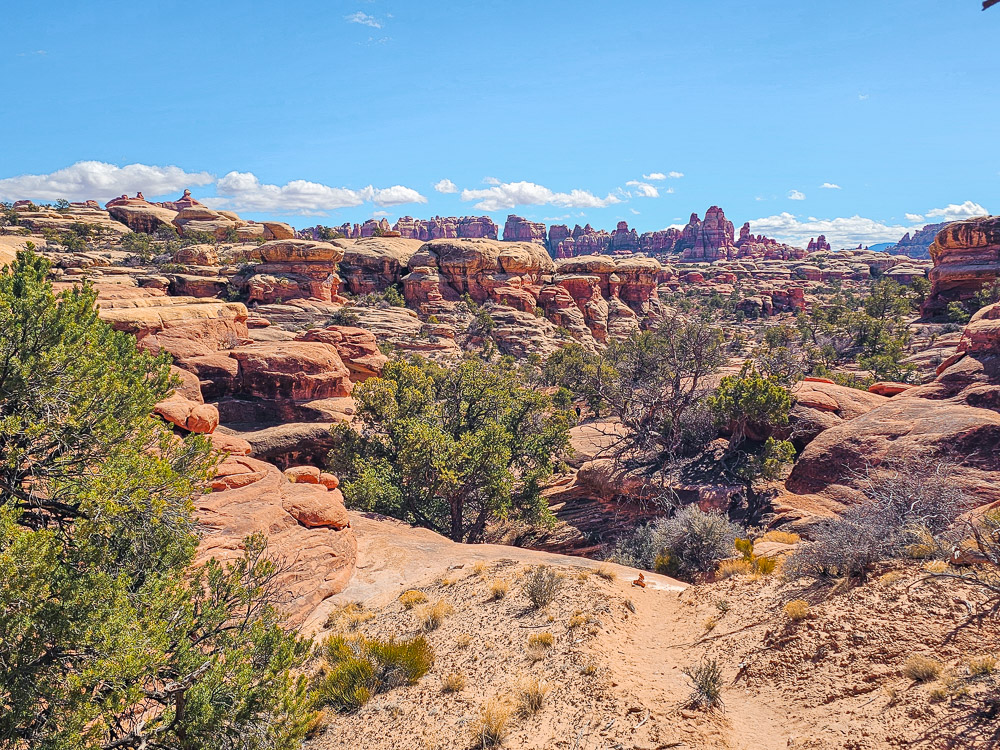
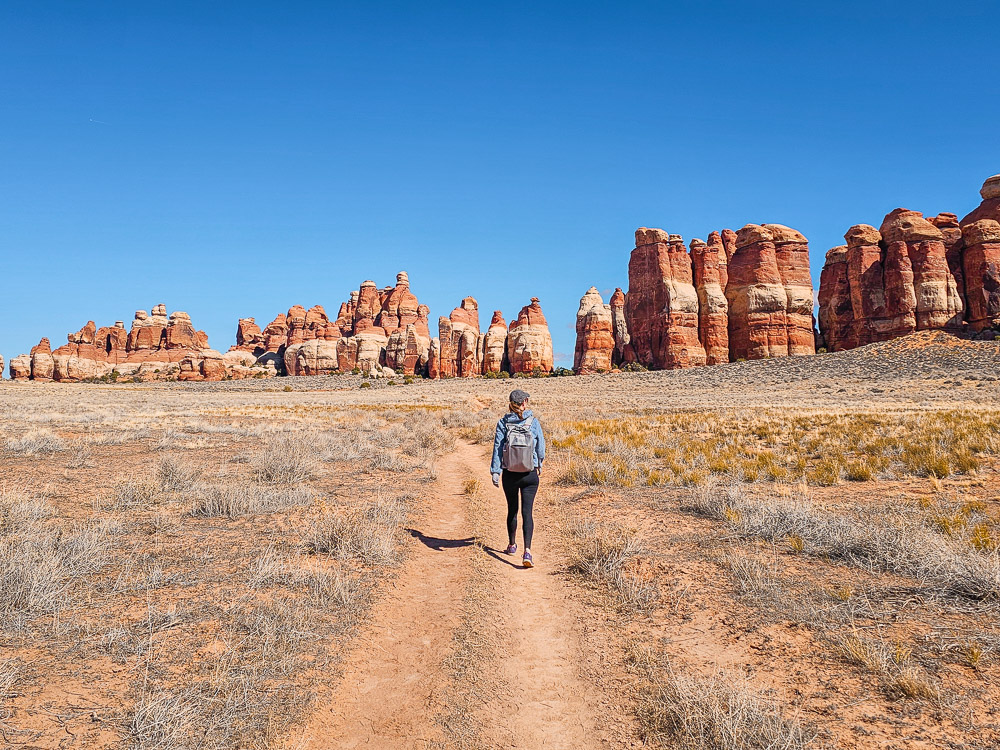
You’re now entering the heart of Chesler Park, a wide, grassy basin roughly 1 to 1.5 miles across, shaped like a rounded rectangle and encircled by towering spires. The loop through this area covers about 5 miles, making up half the total distance of the hike.
You can hike it in either direction, clockwise or counter-clockwise, and each offers a slightly different experience.
Going clockwise means you’ll start with the more open and less dramatic section (though still beautiful), the transition through the notch will be exciting, and you’ll finish the loop walking right next to and among the towering needles.
Going counter-clockwise is a bit easier overall, and you’ll get jaw-dropping views almost immediately.
AllTrails recommends the clockwise direction — and that’s what we did — but a large number of hikers were going counterclockwise. After doing the hike, I do think that option is slightly better, so that’s what I’ll describe for the rest of this guide. Either way, make sure to turn around often so you can admire the views all around you.
The North and West
Starting the loop by heading right takes you along the northern edge of Chesler Park, where the needles are at their most rugged and extensive.
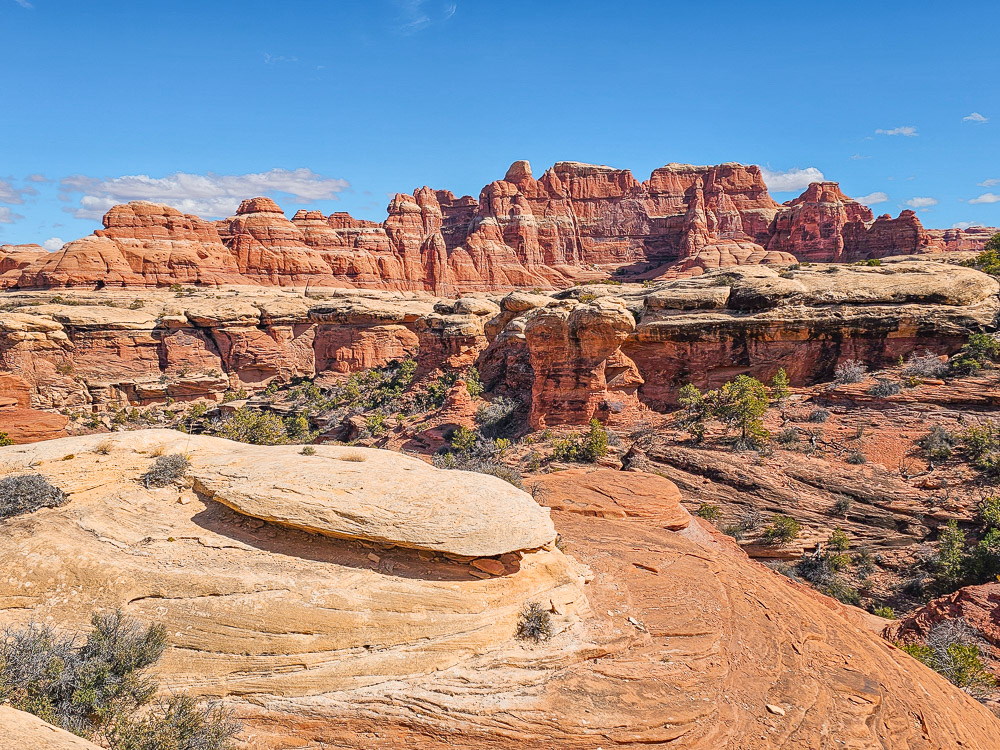
The trail frequently dips and rises as it hugs the rock formations, and this stretch felt especially scenic. And just when you think you’ve seen all of the park, another cluster of spires appears in the distance!
Please enjoy these pictures of this section of the trail. Truly, the views were insane.
You’ll then descend a fairly steep section into a sandy wash. The views looking south during this descent were some of our favorites of the entire hike. Once you reach the bottom, the trail flattens out and briefly joins a 4×4 route. This flat portion makes up most of the western side of the loop.
As you curve around the southern end and begin climbing again, the terrain gets more rugged. The rock here is darker and rougher, and the rising elevation opens up wide views over a whole new stretch of needles to the south. It’s all just unbelievably beautiful.
The Joint
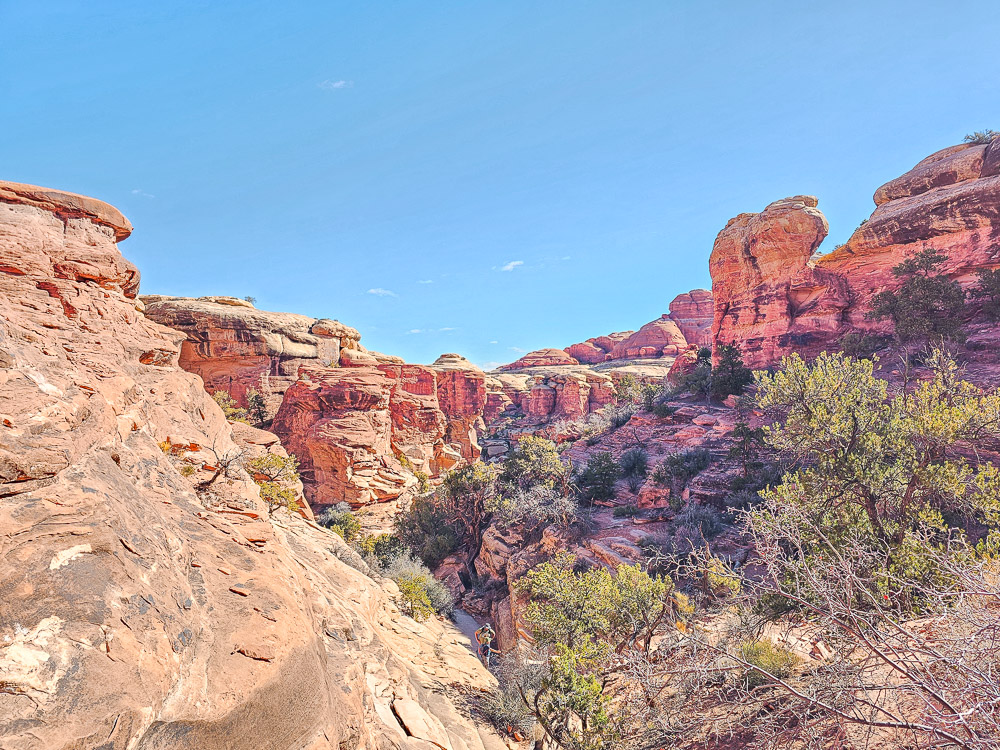
About halfway along the southern edge of the loop, you’ll reach an area called the Joint. From above, it looks like a giant checkerboard—not with black and white squares, but with huge sandstone slabs that have fractured as they slowly shifted across a salt layer below.
As you enter, the gaps between the slabs narrow, eventually forming tight slot canyons with sheer, towering walls on either side and several cross-cutting canyons that intersect the main route. It’s a fun and unique section of the hike, with a few easy scrambles up some large boulders.
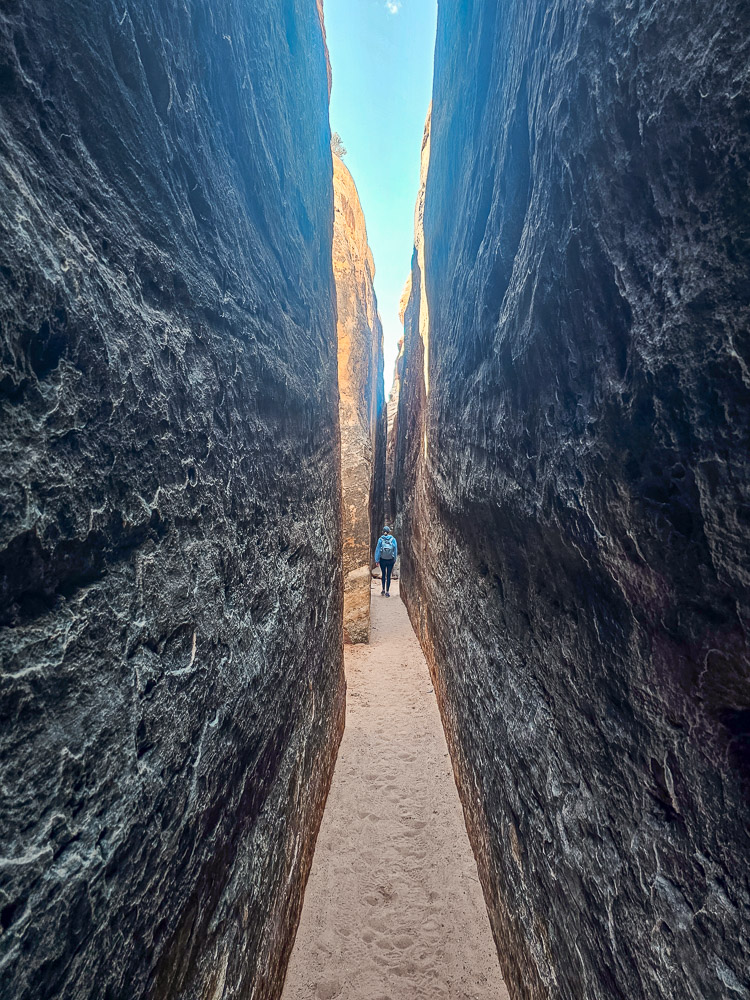
We really enjoyed this part of the trail — it felt adventurous and different from anything else on the loop.
The South and East
Once you exit the Joint, the rest of the hike is fairly flat. You’ll walk on a nice path through open, grassy fields, with the needle formations now set a bit farther off in the distance. Keep an eye out for some “windows” into the canyons further east, as well as a nice primitive backcountry camping area.
You’ll make it back to the start of the loop, head back to the Chesler Park Overlook, and retrace your steps along the same route that brought you in, back to the trailhead.
Optional: Add on Druid Arch

If you’re up for an extra long, but epic hike, then you should consider adding on Druid Arch. Druid and Chesler share the same trailhead, and the first 2.5 miles are the same between both trails.
Because of this, if you do each hike separately, you’ll end up doing two 10 mile hikes, but if you combine them, you cut it down to 15-16 miles. Now, 15 miles all at once is no joke, so only do this if you are in solid hiking shape. Full disclosure, we did do these hikes on two separate days, ourselves.
Alltrails suggests doing Druid Arch first, and then doing Chesler Park in a clockwise route. I would actually suggest you do Chesler Park first, counter-clockwise, and then finish with Druid.
I’d recommend this both because I think that is the better route through Chesler, but also because Druid Arch is simply so EPIC, I’d put it as the finale.
Final Thoughts
This hike was absolutely stunning, easily one of our favorites in Canyonlands. It’s the most popular trail in the Needles District for a reason, and we found ourselves stopping every couple of minutes to take another photo.
That said, it never felt crowded. We often went 20–30 minutes without seeing another person.
This hike is best done in the spring and fall, when temperatures are mild. If you’re hiking in summer, be prepared: there’s almost no shade and the trail is longer and more strenuous than it looks. Bring plenty of water.
Overall, the Chesler Park hike is absolutely worth the time and effort and makes for an unforgettable day in the national park.
![9 Incredible Hikes in Snow Canyon State Park [St George, Utah]](https://usadventurer.com/wp-content/uploads/2024/01/hidden-pinyon-trail-snow-canyon-state-park-768x576.jpg)